
No More Room in Hell 2 Raven Rock Objective Guide
Follow the reliable Raven Rock objective flow in No More Room in Hell 2 without relying on fixed gate codes, item spawns, or a single extraction branch.
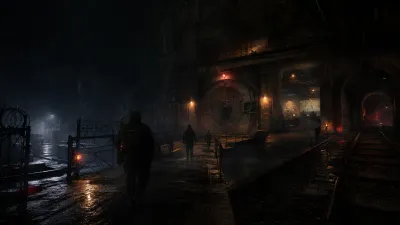
Raven Rock is the version 1.0 Objective map built around a fortified underground installation in southern Pennsylvania. This Raven Rock guide covers the reliable map flow: get through the perimeter, enter the bunker, restore the systems named by the current objective, reach the expansion area, and complete the active extraction route.
The important warning is that Raven Rock is not a fixed-code walkthrough. Two independent current 1.0 recordings show different gate assignments, different code values, changing subsystem tasks, and different late-mission routes. Read the code book and objective text in your own match instead of copying a number or forcing a route from somebody else’s run.
September 15 recheck: what Resupply changes for Raven Rock
The official September 9 Resupply (1.1) preview focuses its map changes on a new Pottsville scenario and smaller objective-flow changes in Lewiston. It does not announce a Raven Rock route rewrite. That means the route skeleton below remains the best current Raven Rock baseline while the live 1.1 rollout is checked.
There is one important Raven Rock-specific developer note from the September 8 post-Armageddon AMA: players reported that securing critical supplies on Raven Rock could be extremely difficult, and the team said that is not intended and can be investigated. Treat critical-supply availability as a known issue rather than assuming a missing item means you have misunderstood the bunker route.
Practical consequence: keep following the active objective markers and variable-code flow below, but do not waste a run endlessly sweeping the map for a critical supply that may be affected by the acknowledged issue. The official announcements feed is the source to recheck when Resupply’s final notes land.
Raven Rock route at a glance
| Phase | Reliable task | What can change |
|---|---|---|
| Perimeter | Find the code book and open the assigned gate | Gate side and code |
| Bunker entry | Cross the exterior hazards and operate the main blast door | Approach and active interactions |
| Facility systems | Complete the highlighted bunker subsystems | Ventilation, breakers, valves, security, or server tasks |
| Command area | Find the current access information and reach the expansion tunnel | Code and room sequence |
| Expansion area | Restore the required circuit and clear the blocked route | Fuse, wiring, power, and detonator steps |
| Extraction | Follow the current objective through the final defense | Recorded 1.0 runs show more than one late route |
This table is the dependable skeleton recovered from an official mission description and two independent post-launch walkthrough transcripts. It deliberately avoids exact codes and loot locations.
1. Find the current perimeter code
Start by reading the objective and locating the code book named by the mission. Do not run directly to a remembered keypad. One current Hard-mode run entered through the east side, while another cooperative run was directed to the west side. The spoken code values also differed.
Use a simple split:
- One pair searches the marked buildings or tents for the code book.
- The rest keep a safe route to the assigned gate and control nearby infected.
- The player who finds the book reads the full code over voice before anyone reaches the keypad.
- Regroup before opening the perimeter. Entering alone turns the next hazard section into a rescue problem.
The exact book spawn is variable or not yet confirmed. Follow the active marker rather than a static location from a video.
2. Reach and operate the blast door
After the gate, the team works toward the main bunker entrance. Current recordings show exterior electrical, gas, or power hazards around this phase, but their exact combination and order should be treated as run-dependent.
Before touching a control panel:
- Clear enough space for the interacting player to finish the action.
- Keep one person watching the route behind the squad.
- Check whether the current objective has changed from “reach” to “activate,” “restore,” or a named switch task.
- Wait for the blast-door sequence to complete before scattering into the bunker.
If the door appears inactive, search the highlighted control area and follow the objective text. The evidence does not support one universal switch order.
3. Complete the active bunker subsystems
Inside Raven Rock, the objective chain can branch through facility systems. Across the current recordings, spoken tasks included combinations of ventilation, breakers or power, valves, security alerts, sensors, and server work. These are corroborated as a family of bunker objectives, not as a guaranteed checklist in one fixed order.
The safest method is to treat every subsystem as a short team operation:
- Read the new objective before leaving the completed room.
- Keep the interaction player protected instead of having everyone search independently.
- Mark the last safe junction so the group can return if the path loops.
- Use the Unstuck option only as recovery; the official 1.0 overview says it has a five-minute cooldown.
- Conserve ammunition for forced defenses and narrow corridors. Raven Rock’s long interior route punishes an empty team late.
If a video shows a room that your objective does not name, skip it and follow your current prompt.
4. Find the expansion-tunnel access information
The next stable milestone is the command or joint-operations area. Both longer routes eventually require current access information before the team can enter the expansion section.
Again, the access code is not universal. Search the room identified by the current objective, read the displayed book or screen, and communicate the value to the keypad player. A code quoted by a creator is evidence that the mechanic exists, not a reusable solution.
This is also a good regroup point. The expansion tunnel leads into a more committed endgame sequence, so redistribute healing, infection treatment, ammunition, and objective items before moving on.
5. Restore the circuit and clear the route
In the expansion area, the recorded routes converge on power and demolition work. Spoken objectives include wiring panels, inserting fuses, restoring power, bringing a detonator circuit online, triggering the blast, and clearing debris from the tracks or passage.
Use the objective nouns as your navigation anchors:
- Fuse or power: search the highlighted electrical area, not the whole bunker.
- Wire or panel: protect the interaction point until the action completes.
- Detonator: confirm the squad is ready before triggering the next defense.
- Debris or tracks: finish the clearance task before settling into a defensive position.
Fuse spawns, panel order, and the exact path between rooms remain pending visual and in-game confirmation. The page does not invent a fixed map diagram.
6. Follow your run’s extraction objective
Do not assume that reaching a train platform always ends the mission. One current cooperative recording clears the tracks, waits for the train, defends it, and departs. A separate Hard-mode recording continues back toward a topside area and ends with a different evacuation interaction.
That difference may reflect objective variation, mission state, or another condition not established by the transcripts. The practical rule is reliable even while the cause remains pending:
- Read the objective after every apparent extraction event.
- Follow the active route lights and markers.
- Do not stay behind because a familiar platform “should” be the ending.
- Keep enough ammunition and healing for one more defense until the result screen confirms extraction.
For the broader distinction between early and final extraction, use the beginner guide. To learn Raven Rock without risking a Responder, review the Solo Mode guide; Solo does not grant normal progress or rewards in the current official 1.0 overview.
Common Raven Rock failures
- Copying a code from a video instead of reading the current code book.
- Going to the east or west gate before the objective identifies the active side.
- Treating every recorded subsystem as mandatory in every run.
- Splitting across bunker floors and leaving the interaction player unprotected.
- Spending all ammunition before the expansion and extraction phases.
- Assuming the first train or evacuation cue is the final result.
If you only need the version 1.0 map inventory, return to the all-maps guide. Combat choices for long interior missions are covered in the weapons and combat guide.
Source check
The setting and mission premise were checked against the official Raven Rock release article and the official Armageddon overview. The route skeleton and variability warnings were independently compared against ProtoShard’s current Hard-mode walkthrough and Dead Squirrel’s current cooperative walkthrough. On September 15, the route was rechecked against the September 8 developer AMA and September 9 Resupply preview. The preview names Pottsville and Lewiston changes, not a Raven Rock route rewrite; the AMA separately acknowledges Raven Rock critical-supply availability as an issue under investigation. Fixed codes, exact spawns, and an explanation for alternate extraction branches remain unconfirmed.
Continue the operation