
No More Room in Hell 2 Survival Mode Guide 1.0
Learn the version 1.0 Survival loop in No More Room in Hell 2: three speaker-defense waves, preparation time, failure rules, extraction, maps, and team roles.
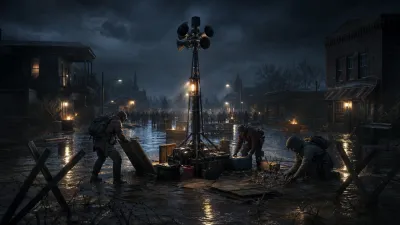
Survival is version 1.0’s faster, combat-focused alternative to Objective scenarios. Instead of crossing a large map through a chain of missions, the team protects speaker systems that pull the horde away from civilians.
The verified Survival loop
The Armageddon 1.0 notes describe this sequence:
- Responders arrive with a few minutes to loot and prepare around the first speaker position.
- A wave begins and the team protects the broadcasting speakers for five minutes.
- After a successful wave, the CRC sends another supply drop and the team moves to the next point of interest.
- Completing three waves triggers helicopter extraction.
- Failing two waves opens early extraction to prevent a total disaster.
The official July Survival article also confirms three points of interest on each map and a three-wave structure.
What to do during preparation time
Preparation is not a race to collect the most personal loot. It is the moment to turn a location into a defensible team space.
- Identify at least two paths into and out of the speaker area.
- Find the local traps and defensive interactions before pressure begins.
- Put ammunition near players using firearms rather than spreading it evenly by habit.
- Keep a recovery route open; a strong position can become a trap when every doorway is blocked.
- Call out medical and infection resources before the wave, not after someone needs them.
These are tactical recommendations inferred from the verified rules and map descriptions. Spawn positions and best routes are not asserted because they can vary.
The three version 1.0 Survival maps
| Map | Verified setting | Defensive problem |
|---|---|---|
| Flooded | Storm-hit industrial area in rural Pennsylvania | Water obscures the ground and reduces comfortable dry loot space |
| Lighthouse | Coastal neighborhood and cliffside beacon | Tight interior spaces and limited retreat room |
| Night of the Living Dead | Farmhouse, guest house, and barn | Multiple doors, floors, and approaches across a compact farmstead |
The defensive-problem column summarizes the official map descriptions; it is not a claim that one map is harder than another.
Team roles without rigid classes
No fixed class composition is required by the sources. A useful temporary split is:
- Scout: checks the next point and calls the safest route.
- Anchor: stays near the speaker and watches the least visible approach.
- Resource runner: collects the supply drop and redistributes ammunition or medical items.
- Control player: uses traps, chokepoints, and crowd-control tools when the perimeter bends.
Players can swap roles between waves. The goal is coverage, not a permanent character label.
When to use firearms
Survival deliberately pushes the squad into combat, so saving every bullet is not realistic. The better question is when gunfire buys enough control to justify the noise and limited ammunition.
Use firearms when:
- a lane is collapsing faster than melee can stabilize it;
- an armored or distant threat cannot be handled safely at close range;
- the team needs time to revive, move, or reset a trap;
- the final part of a wave leaves no later reason to preserve the same ammunition.
Use the weapons and combat guide for current evidence about spread, suppressors, penetration, and melee tradeoffs.
Failure and extraction
The current notes say two failed waves open early extraction. That is a recovery option, not proof that the run will still grant the same rewards as three successful waves. The general 1.0 extraction rules say early extraction gives no character progression and only a small portion of Credits.
If the squad has already lost control twice, preserving a developed Responder may be worth more than gambling on a damaged position.
Survival or Objective?
Choose Survival when you want compact maps, fast combat pressure, and a clear three-wave rhythm. Choose Objective when you want navigation, task chains, supply collection across a large scenario, and a final extraction window.
Both modes contribute to the broader progression loop, but their moment-to-moment demands are different. The all maps guide keeps the two pools separate.
Source check
This page was checked against the official Night of the Living Dead article, official current announcements, Gematsu’s 1.0 feature report, GameSpot’s Survival preview coverage, and a current Flooded/Lighthouse playthrough on August 13, 2026.
Continue the operation