
No More Room in Hell 2 Beginner Guide for 1.0
Start safely in No More Room in Hell 2 version 1.0 with a first-match checklist for the tutorial, difficulty, infection, supplies, noise, and extraction.
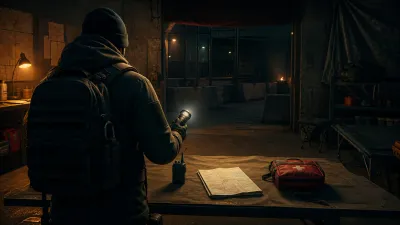
No More Room in Hell 2 is a cooperative survival-horror game where a good decision is often worth more than an extra kill. Version 1.0 added a guided tutorial, clearer difficulty choices, Survival and Solo modes, and a more explicit progression loop. This guide focuses on the facts a new player needs before risking a Responder.
The shortest useful first-match plan
- Complete the guided Tutorial before entering a public mission. The 1.0 notes say it covers melee, ranged combat, objective trials, and inventory management.
- Start on Beginner if you want control hints and timed respawns while learning. Move up only when the basic loop feels predictable.
- Pick Objective if you want the full cooperative mission and extraction loop. Use Solo when you want risk-free map practice.
- Treat ammunition, medical items, and infection treatment as shared survival resources.
- Keep an exit route. A living Responder can extract early; a dead one may lose individual progress.
That sequence is a practical recommendation based on the current rules. It is not an official build order.
Post-launch fixes worth knowing (1.0.3.1 + 1.0.4.0)
Several launch-week problems are fixed since the first days: the Asia server routing issue, “server is full” errors, the Broadway track stuck, the Guiding Light achievement, and controller/menu issues. Survival gained a final respawn at the end of Wave 3 and at the start of extraction; Objective’s pre-extraction respawn is coming in the next update. If you played in Early Access and your keybinds reset, that was the 1.0.3.1 hotfix — re-set them.
Know the two mission types
Objective scenarios take place on larger maps. The team completes a linear chain of CRC tasks and works toward a final extraction window.
Survival maps are smaller and more combat-focused. The squad defends speaker systems across three waves. If that is the mode you want, use the full Survival Mode guide.
Version 1.0 also includes Solo Mode for learning maps without traditional progression or permadeath. Read the Solo Mode guide before assuming a solo run grants the same rewards as multiplayer.
Pick a learning difficulty, not an ego difficulty
The Armageddon notes describe four options:
| Difficulty | Current onboarding behavior | Practical use |
|---|---|---|
| Beginner | Control hints, objective reminders, and timed respawns | Learn navigation and interaction rules |
| Normal | Respawns after major objectives | Learn the standard cooperative rhythm |
| Hard | Higher pressure and harsher loss conditions | Use after the team can recover from mistakes |
| Nightmare | The most hostile mix of zombies and scarce resources | Endgame challenge, not a tutorial |
Balance values can change after launch, so this page avoids turning patch-note percentages into permanent advice.
Noise and scarcity shape every fight
GameSpot’s 1.0 overview describes a slower, harder game where gunfire can attract trouble and melee remains important. The official store material likewise emphasizes scarce ammunition and a reactive horde.
Use that as a decision rule:
- Prefer a quiet, controlled solution when one or two enemies block the route.
- Keep firearms for range, armor, a collapsing position, or a wave that the team cannot safely control with melee.
- Do not split every useful item evenly by habit. Give infection treatment, healing, or ammunition to the player who can use it before the next objective.
- Say what you are doing. Proximity voice exists because coordination is part of the survival system.
These are tactical recommendations inferred from verified mechanics, not guaranteed optimal play.
Infection is a timed team problem
The current official launch description says infection can progress from minor symptoms toward turning. Phalanx pills delay the condition and have limited doses. Experimental gene therapy can cure infection, but the official description says only one spawns per match.
If symptoms appear:
- Tell the squad immediately.
- Check the remaining treatment before using it.
- Re-evaluate whether the group can reach the next objective and final extraction.
- Consider early extraction if continuing would risk the Responder and the team.
The exact item location is not fixed on this page because spawn behavior and map routes can change.
Understand early and final extraction
The official 1.0 announcement distinguishes two exits:
- Early extraction preserves a Responder when a run looks unmanageable, but gives no character progression and only a small portion of Credits.
- Final extraction awards character experience and Credits based on the team’s collected Supplies.
That makes extraction a risk decision, not merely a win/lose screen. The progression guide explains what belongs to the account and what is exposed to permadeath.
Five mistakes to avoid
- Treating the mission as run-and-gun, then creating noise without a route out.
- Ignoring visibility and walking into dark interiors without coordinated light.
- Spending firearm ammunition on isolated threats the team can control quietly.
- Leaving support range to loot alone.
- Fighting endlessly while the objective and extraction route stop advancing.
These five patterns also appear in a recent creator beginner guide at 00:35–03:37. They are player-facing tactical advice, not hidden official rules; the recommendations above are retained because they align with the verified noise, scarcity, cooperation, objective, and extraction systems.
Source check
This page was checked against the official Armageddon 1.0 overview, official Steam announcements, GameSpot’s current 1.0 overview, the Epic Games editorial primer, and the timestamped creator guide above on August 13, 2026.
Continue the operation